Robert’s Ramblings

a little on life, the universe and everything… …and maybe the odd bit of scuba diving too!

Nexus Underwater Housing With Canon EF 17-40mm Zoom


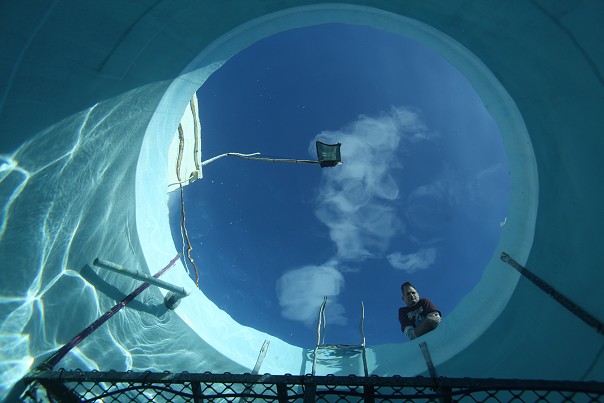
New housing, initial configuration, first dive, first photograph. This image taken from the bottom of the tank looking skyward is quite a fun shot but after a little while it became evident to me that something was not quite right. After 30 minutes of ‘snaps’ and subsequent review I noted that the edges of my shots were often soft and my close focus capability was not what I expected. It was time to take a crash course in dome optics to try and understand these issues.

My initial configuration of Nexus M6 underwater housing , FP-160 dome with 40mm extension for the Canon EF 17-40mm zoom was set up for me by the guys at Sea Optics here in Adelaide. David and Carey have looked after me well over the last few years, given good advice and been patient with all my questions. This configuration was a first for them so they are just as eager as I am to get this combination right. After dive one it was time to debrief.

Dome ports provide underwater photographers with the ability to use wide angle lenses without field-of-view robbing diffraction and the well understood underwater magnification factor of 1.3x. For a wide angle photograph, you really need to restore the full field of view and this is what dome ports are good for. Unfortunately they are not always easy to get right, especially if you try and use a lens not actually designed for the job.

After a first round of googling, I discovered the existence of three key magic parameters in getting a dome configuration right: ‘dome focal point’, ‘virtual infinity’ and ‘entry pupil’. The first of these is quite easy to get your head around. The focal point of a spherical dome is at the radius of its curvature. The second, the virtual infinity is some point in front of the dome where everything from you out to infinity has been compressed. The general rule of thumb here is three times the internal dome radius. In other words, if you have a dome with a radius of 8cm, then the entire undersea world will exist as a virtual image somewhere between the surface of the dome and the virtual infinity at 24cm. The last and most mysterious of these magic parameters is the ‘entry pupil’ of the lens. This is the point through which all rays of light converge within the lens on their way to the CCD, imager or film pane. It is generally the same point where the aperture control of the lens is placed. Now just to really mess with your head, it’s not the real location of the aperture but the virtual one, and it moves around as you change zoom, focus and F-stop setting!

A bit of searching will reveal a host of techniques for locating the entry pupil location of a lens. This is a hot topic for photographers who stitch together multiple photographs for panoramic image creation, especially panoramas involving objects at close range. My favourite method involves simply placing your camera on a sheet of blank paper and drawing two parallel vertical lines up the left and right edge of the image as seen through the viewfinder or preview screen. Take away the camera and then extend these two lines to find where they cross. This is the point within the lens where the entry pupil exists. You will need to repeat this for all combinations of zoom length, focus and aperture and then use the average.

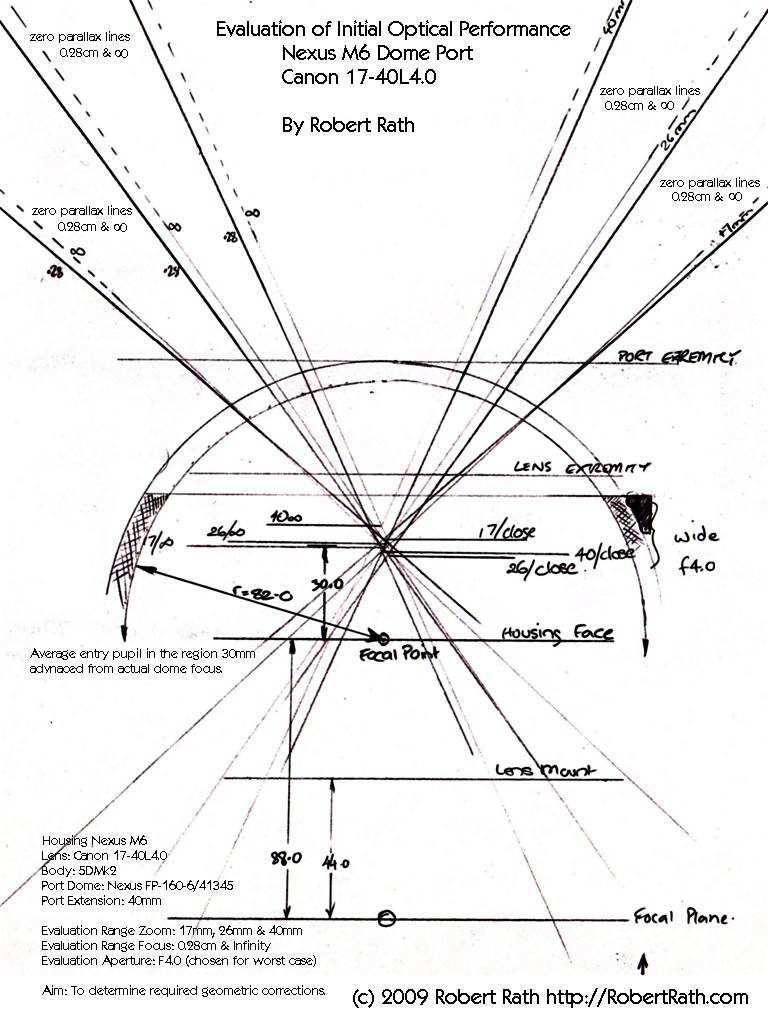
Armed with a bit of knowledge I sat down with my gear, rulers, paper and pencil and here’s what I found my initial set-up actually looked like geometrically:

Figure 1. Evaluation of Initial Optical Performance


Test Details

Housing Nexus M6
Lens: Canon EF 17-40mm F4.0L
Body: 5DMk2
Port Dome: Nexus FP-160-6/41345
Port Extension: 40mm

Evaluation Range Zoom: 17mm, 26mm & 40mm
Evaluation Range Focus: 0.28cm & Infinity
Evaluation Aperture: F4.0 (chosen for worst case)

Aim: To determine required geometric corrections.

Findings

All test/measurements were done at F4.0 on the assumption that this is the worst possible F-stop to get right. Subsequent measurements show a small movement in ‘entry pupil’ location as F-stops changed, but insignificant compared to the benefits of smaller apertures.

What I found was that the lens appeared to be located 30mm forward of the optimal location based on dome curvature. In an ideal world I’d just add another 30mm of extension and repeat just to confirm the measurements were correct, but alas, nothing is simple with underwater photography. Moving the dome forward will create significant vignetting of the image as the dome structure obscures some of the light and competes as a virtual aperture. This is because the dome is not a full hemisphere.

I plan to experiment with a combination of diopters and extension lengths to address the following three issues:

a) Correcting the entry pupil location to assist keeping the entire frame sharp.
b) Removing the vignetting associated with moving the dome forward.
c) Bringing the virtual foreground closer to the dome surface for better close focus performance without losing infinity.

My next two tests will be done with:

a) An extra 20mm of extension and a +2 diopter, and
b) An extra 30mm of extension with a +4 diopter.

I will write about my rationale for their selection in a later post along with my results.

Until the next post, take care out there and keep diving ( if that’s what you do! ) …Robert 🙂


Mr. Ray’s an Edithburgh Local


A couple of weekends ago we were in Edithburgh again joining Paul McDonald for his first PADI DUWP course. It was fun just being involved without leading the course. A chance to just dive and take photos and be with a bunch of people who love diving and cameras. Over the weekend we dived at Edithburgh and Wool Bay. I even had the chance to do my first night dive here in ages even if it was cut a little short as I watched the tide rising inside the lens of my torch. Oh well it had served me well for more than 15 years so time to get a new one anyway.

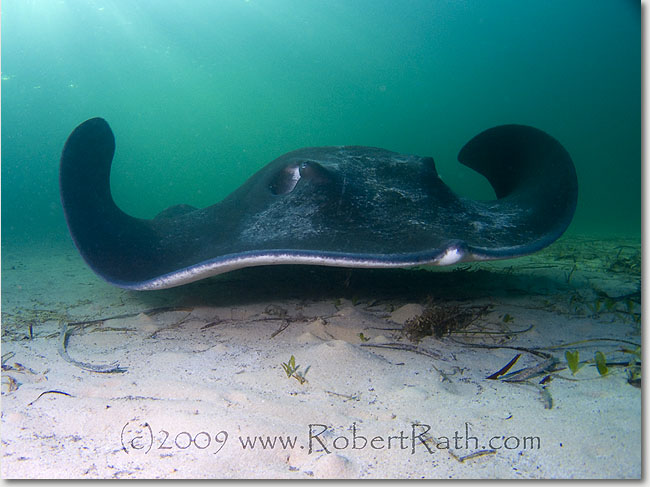
I am delighted to say that Mr. Ray was here under Edithburgh Jetty again to pose for our cameras. I have seen this ray on many dives here over the last year and I am convinced it is the same ray. So officially or not I am declaring Mr. Ray an Edithburgh local.

I’ll be posting a few more images from this weekend over the next few days so keep an eye out for some of the interesting critters we came across.

Until the next post, take care out there and keep diving ( if that’s what you do! ) …Robert 🙂

Photo: Robert Rath C7070 1/125s at f/3.5 ISO200 Inon UWL100-28AD Lens, Strobe + Natural Light

South Australian Tourism and Leafy Seadragons


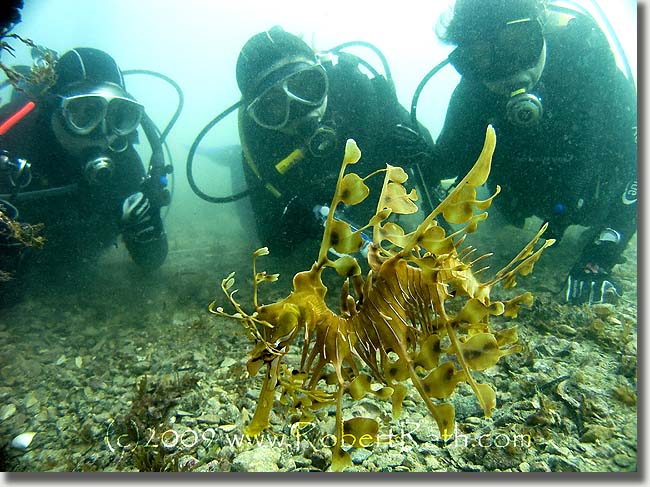
I have just had the pleasure of spending the last two days diving with my new Japanese friends, Yuko, Hiroko and Masashi, who all made a special trip to Adelaide in South Australia to see our wonderful Leafy Seadragons.

Two things that always go through your mind when organising to dive somewhere are that you hope that the weather will be nice, and you hope that you get to see or do what you are planning.

The same goes for those who host such dives. We always want to show off South Australian diving in its best possible light. I had been very stressed in the days leading up to these dives as South Australia had just experienced some of its worst weather in years. Our beautiful waters had turned into silty chaos and the sea was looking decidedly uninviting. As luck would have it, the two days we had planned turned out to be the calm between two storms. We at least got blue sky and gentle seas, but the visibility would be a challenge.

We spent a day at Rapid Bay and a day at Victor Harbor. Although visibility ranged from 1-3 metres both days, that did not stop Yuko and Masashi from going camera crazy and being the cause of future Leafy cataracts with their strobes. I do not envy them the backscatter they will have to peer through when they get home. Hiroko was happy to just look on; I’m sure I heard her squeal with delight on more than one occasion.

Thirteen beautiful Leafy Seadragons and one stunning Weedy Seadragon; result, three ecstatic Japanese guests taking photos and stories home.

Until the next post, take care out there and keep diving (if that’s what you do!) …Robert 🙂

Photo: Robert Rath C7070 1/90s at f/2.8 ISO200 Inon UWL100-28AD Lens, Natural Light

Experiments in Photographic Art – Henley Beach Jetty


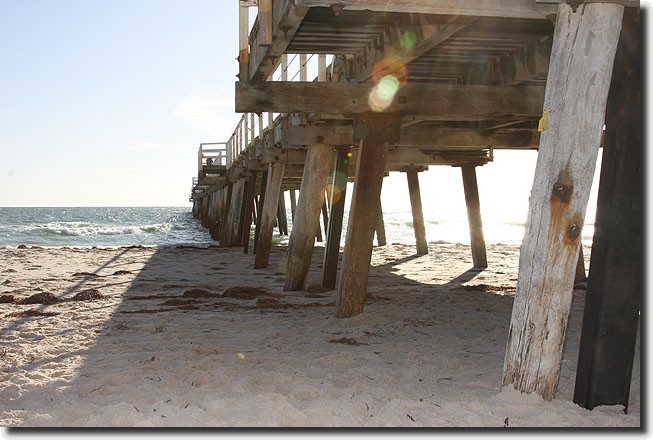
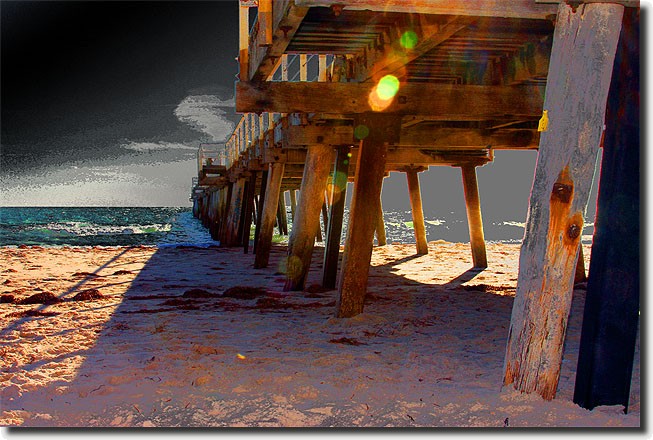
I took some quite ordinary photos at the beach yesterday and was about to throw them forever into the eternal pit of hard drive wilderness but then decided instead to play around a little first. Inspired by some of the photographic art of Stephen Kiernan, I took a very average JPG photo with blown out exposure and all sorts of other faults. The only thing going for it was that I liked the composition.

I then started plying around disrespectfully with the controls of my photo editing program. Colour saturation was the first casualty, set to maximum. I played around with the gamma on individual colour channels and finally did a little colour replacement. All very uncool things to do to a photograph but the result is quite interesting.


For some really stunning examples of HDR (High Dynamic Range) images, visit Stephen’s Flickr Stream and let me know what you think.

Until the next post, take care out there and keep doing stuff ( if that’s what you do! ) …Robert 🙂

Lilies On The Kitchen Table


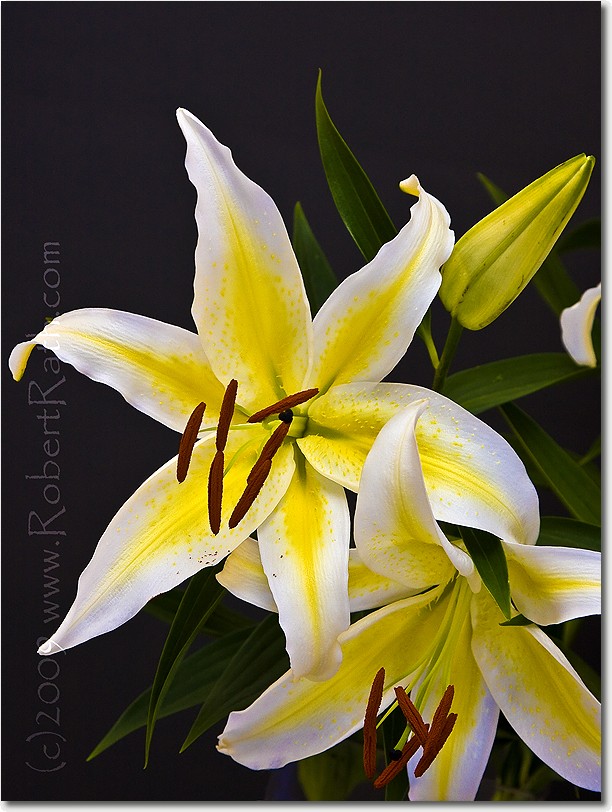
Just in case any of you wondered, yes I do take photographs on dry land from time to time.

I had just finished a tutorial in lighting and was eager to try out some new ideas. Looking around the room I spied a beautiful vase of lilies Jennifer had bought to brighten up the house. A likely candidate I thought and started playing with various combinations of natural light, strobe light and composistion.

This final image was made using mostly strobe light bounced off the ceiling with only a small amount of natural daylight coming in through the windows. The dark background is from the dining room table.

Until the next post, take care out there and keep taking fantastic photos ( if that’s what you’re into! ) …Robert 🙂

Photo: Robert Rath 40D 1/15s at f/6.3 ISO500, Zoom 73mm, Strobe + Natural Light


The New Rapid Bay Jetty, South Australia


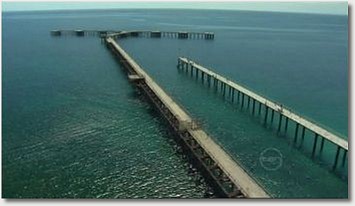
Well the new Rapid Bay Jetty has been open now for a few weeks and I can honestly say it is worth the wait and worth the cost.

I have been diving Rapid Bay Jetty for more years than I care to remember. I remember the long walk to the old T-section and the original diver’s platform. Back then you would cart your day’s diving gear out in the morning, set up camp and dive and enjoy surface intervals right there where you jumped in the water. All that came to an end with the closure of the old jetty some years back.

For many years now diving the jetty has meant an ankle twisting rocky shore entry and exit and a very long swim out and back leaving little strength or enthusiasm for multiple dives. That has all changed now with the opening of the new jetty along side the old one.

The new jetty runs parallel to the old one and for about half the original jetty’s length providing a nice easy walk from the car park to the new divers platform. The divers platform has been staged so that there is ‘walk in’ access over quite a range of tide heights. On a really low tide you might need to use the ladder on the bottom platform. All this beats scrambling over an unstable rocky beach by far.

Rapid Bay Jetty is a wonderful dive and a photographer’s dream when the visibility is good. It is famous as a haunt for Leafy Seadragons and attracts visitors from all over the world who come to see these fantastic creatures. With the new jetty they can now dive in safety and comfort.

Until the next post, take care out there and keep diving ( if that’s what you do! ) …Robert 🙂

Photo: Robert Rath C7070 1/125s at f/2.8 ISO100, Inon D2000 Strobe + Natural Light, Jetty – Courtesy ten.com.au


Chumby, Meet Facebook – Facebook, Meet Chumby


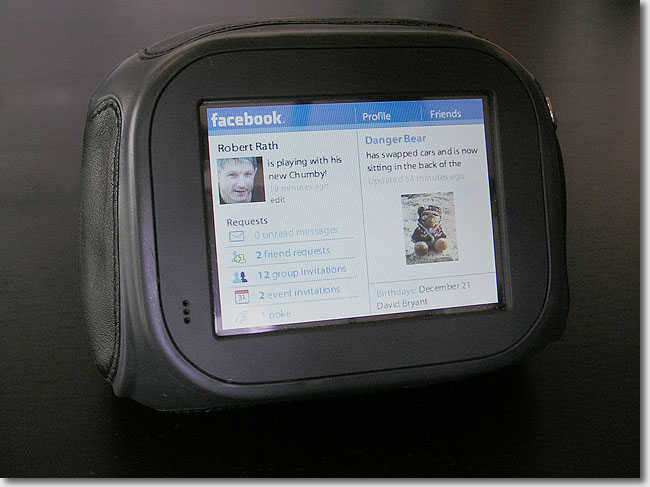
All my friends know I love gadgets and so it will come as no surprise that Jennifer gave me a very, very cool gadget for my birthday called a ‘Chumby’.

What is a Chumby? Well it kind of looks like a little bean bag with a LCD screen. The real question is what can you do with a Chumby or more importanly what can a Chumby do for you?

Wired magazine dubbed chumby one of the cool gadgets of 2008, praising it for bringing “the friendlier face of the Internet into our homes…it did it while disguised as a teddy bear for the 21st century”.

The first thing my Chumby did on being brought to life was to show the time in San Diego and stream snippets of late night American chat shows. Impressive but not useful. However after a short time my Chumby, renamed Scuby, was showing my Facebook updates and streaming my favourite podcast at Killer Innovations.

So a Chumby is a WiFi multi-media marvel in a bean bag. It will sit on your desk, the mantelpiece or by the side of your bed and do what ever you want it to do. Just install the widgets you like or roll your own as it is fully ‘open source’.

Until the next post, take care out there and keep playing with gadgets ( if that’s what you do! ) …Robert 🙂


Juvenile Weedy Seadragon, Victor Harbor


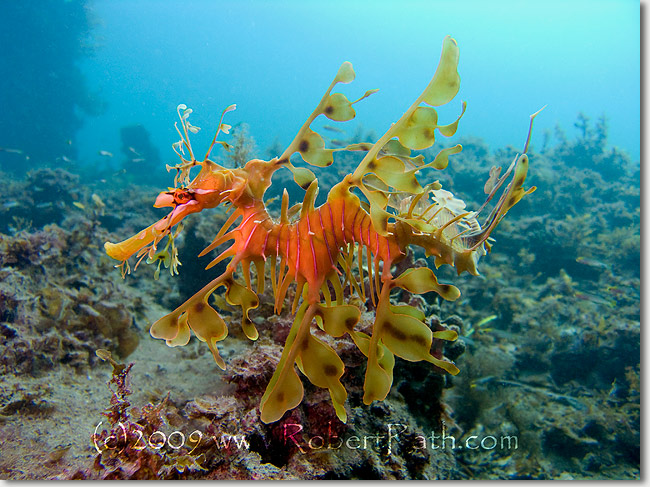
The Weedy Seadragon, Phyllopteryx taeniolatus , is also one of our two famous and unique Southern Australian seadragons.

There is much debate in our diving community here in Adelaide if the Weedy Seadragon is more common than the Leafy Seadragon. I guess that depends on where you dive. In my experience with shore based shallow diving here in South Australia I would say that the Leafy Seadragon is more common and the Weedy Seadragon is less common. On deeper off-shore reefs I have only ever found Weedy Seadragons. Even so, I have dived other parts of Australia where I have seen plenty of Weedy Seadragons in shallow shore based diving. In any case these dragons are hard to see even when right in front of you due to their magnificent camouflage.

This photo was taken at Victor Harbor a couple of weekends ago. It was a juvenile, around 10cm in length and was spotted by my dive buddy. Note that this little dragon is all covered in white silt! Many thanks to my buddy who left both of us in a cloud of muck and silt has he raced off after a cowfish swimming past. Note to non-photographer dive buddies; be aware of your fins and fragile bottoms!!

Until the next post, take care out there and keep diving ( if that’s what you do! ) …Robert 🙂

Photo: Robert Rath C7070 1/90s at f/8.0 ISO100, Inon UCL165AD Macro Lens, Inon D2000 Strobe + Natural Light

Aha Moments


A recurring theme in conversations with successful individuals is some defining moment, an ‘aha’ moment often prompted by a saying or a quote. Suddenly veils and obstructions vanish and what needs to be done becomes clear to achieve your gaols.

Jennifer Liston in her post ‘Revelationary Statements‘, shares one of those moments. Read about Jennifer’s ‘Aha’ moment at http://www.wordsworx.com and share your own experience.

More of my thoughts and insights on innovation, creativity and business can be found at – http://www.innovation-mentor.com