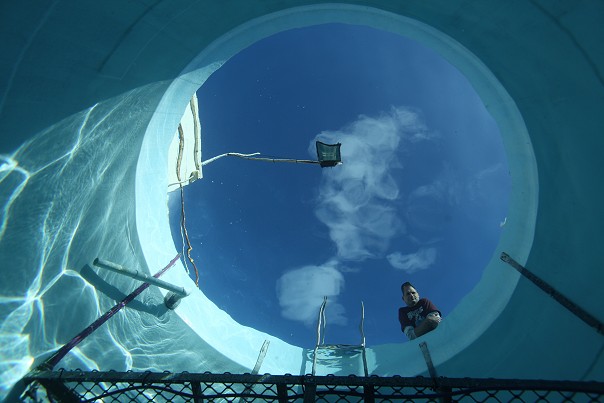
New housing, initial configuration, first dive, first photograph. This image taken from the bottom of the tank looking skyward is quite a fun shot but after a little while it became evident to me that something was not quite right. After 30 minutes of 'snaps' and subsequent review I noted that the edges of my shots were often soft and my close focus capability was not what I expected. It was time to take a crash course in dome optics to try and understand these issues.
My initial configuration of Nexus M6 underwater housing , FP-160 dome with 40mm extension for the Canon EF 17-40mm zoom was set up for me by the guys at
Sea Optics here in Adelaide. David and Carey have looked after me well over the last few years, given good advice and been patient with all my questions. This configuration was a first for them so they are just as eager as I am to get this combination right. After dive one it was time to debrief.
Dome ports provide underwater photographers with the ability to use wide angle lenses without field-of-view robbing diffraction and the well understood underwater magnification factor of 1.3x. For a wide angle photograph, you really need to restore the full field of view and this is what dome ports are good for. Unfortunately they are not always easy to get right, especially if you try and use a lens not actually designed for the job.
After a first round of googling, I discovered the existence of three key magic parameters in getting a dome configuration right: 'dome focal point', 'virtual infinity' and 'entry pupil'. The first of these is quite easy to get your head around. The focal point of a spherical dome is at the radius of its curvature. The second, the virtual infinity is some point in front of the dome where everything from you out to infinity has been compressed. The general rule of thumb here is three times the internal dome radius. In other words, if you have a dome with a radius of 8cm, then the entire undersea world will exist as a virtual image somewhere between the surface of the dome and the virtual infinity at 24cm. The last and most mysterious of these magic parameters is the 'entry pupil' of the lens. This is the point through which all rays of light converge within the lens on their way to the CCD, imager or film pane. It is generally the same point where the aperture control of the lens is placed. Now just to really mess with your head, it's not the real location of the aperture but the virtual one, and it moves around as you change zoom, focus and F-stop setting!
A bit of searching will reveal a host of techniques for locating the entry pupil location of a lens. This is a hot topic for photographers who stitch together multiple photographs for panoramic image creation, especially panoramas involving objects at close range. My favourite method involves simply placing your camera on a sheet of blank paper and drawing two parallel vertical lines up the left and right edge of the image as seen through the viewfinder or preview screen. Take away the camera and then extend these two lines to find where they cross. This is the point within the lens where the entry pupil exists. You will need to repeat this for all combinations of zoom length, focus and aperture and then use the average.
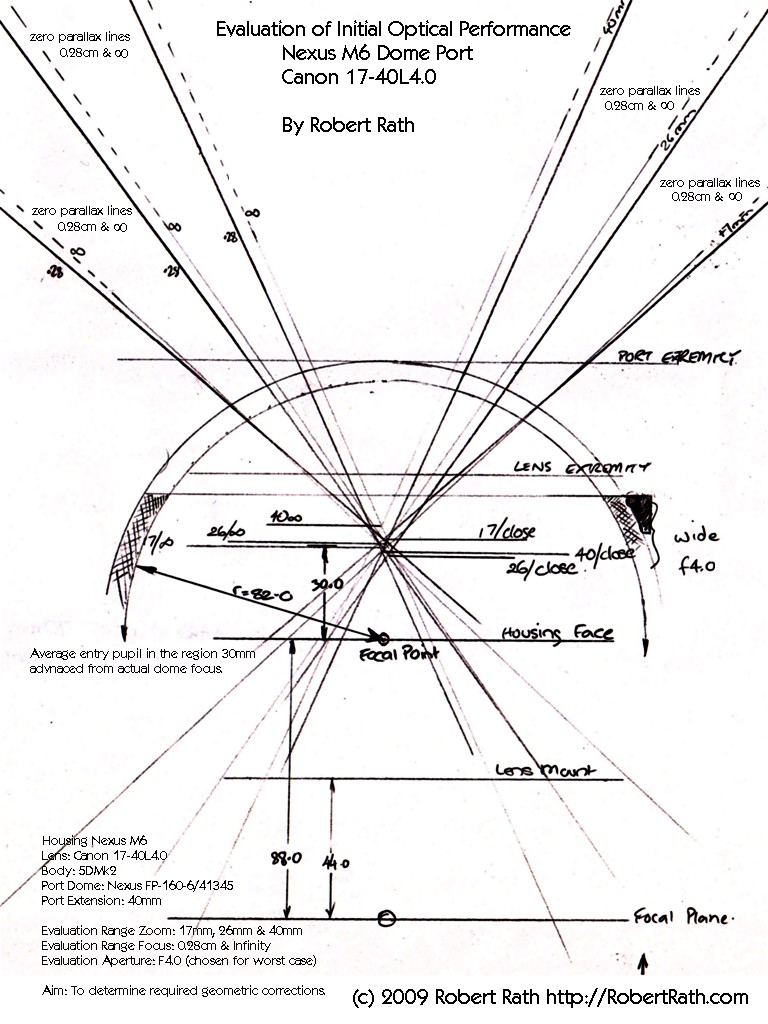
Armed with a bit of knowledge I sat down with my gear, rulers, paper and pencil and here's what I found my initial set-up actually looked like geometrically:
Figure 1. Evaluation of Initial Optical Performance
 Test Details
Housing Nexus M6
Lens: Canon EF 17-40mm F4.0L
Body: 5DMk2
Port Dome: Nexus FP-160-6/41345
Port Extension: 40mm
Evaluation Range Zoom: 17mm, 26mm & 40mm
Evaluation Range Focus: 0.28cm & Infinity
Evaluation Aperture: F4.0 (chosen for worst case)
Aim: To determine required geometric corrections.
Findings
All test/measurements were done at F4.0 on the assumption that this is the worst possible F-stop to get right. Subsequent measurements show a small movement in 'entry pupil' location as F-stops changed, but insignificant compared to the benefits of smaller apertures.
What I found was that the lens appeared to be located 30mm forward of the optimal location based on dome curvature. In an ideal world I'd just add another 30mm of extension and repeat just to confirm the measurements were correct, but alas, nothing is simple with underwater photography. Moving the dome forward will create significant vignetting of the image as the dome structure obscures some of the light and competes as a virtual aperture. This is because the dome is not a full hemisphere.
I plan to experiment with a combination of diopters and extension lengths to address the following three issues:
a) Correcting the entry pupil location to assist keeping the entire frame sharp.
b) Removing the vignetting associated with moving the dome forward.
c) Bringing the virtual foreground closer to the dome surface for better close focus performance without losing infinity.
My next two tests will be done with:
a) An extra 20mm of extension and a +2 diopter, and
b) An extra 30mm of extension with a +4 diopter.
I will write about my rationale for their selection in a later post along with my results.
Until the next post, take care out there and keep diving ( if that's what you do! ) ...Robert


