We recently acquired a pre-loved Roland HP1500 digital piano at a real bargain price.
The real price in time and effort, however, proved to be another matter altogether. This piano was plagued with sticky keys. The previous owner claimed that two keys 'could be temperamental'. Once home, I could easily get eight keys to stay down permanently.
An hour later we had the piano entirely in pieces, with every single key mechanism removed.
Yes, all 88 of them.
Another hour later everything was cleaned and re-greased ('O'-ring grease worked a treat here) and I was ready to re-assemble. This is when the fun began!
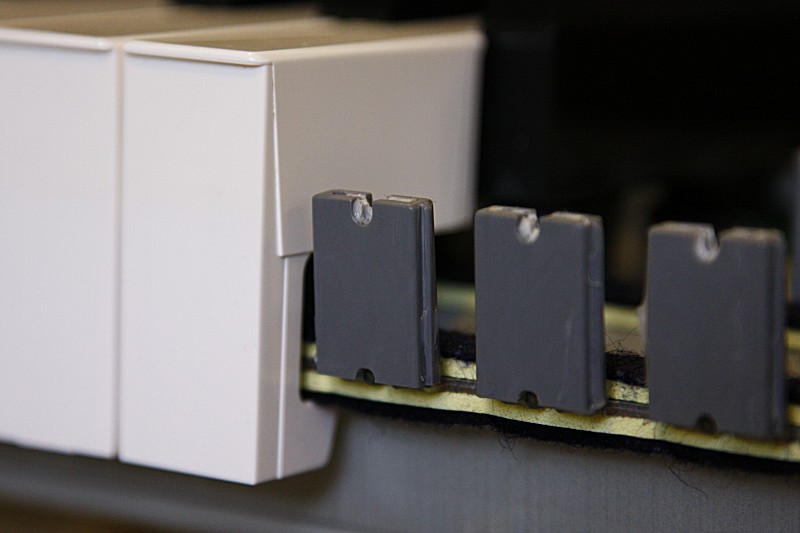
Notice the grey PVC guide posts in the photograph. These are meant to be a perfect non-interference fit inside the keys. Too sloppy, and the key wobbles sideways. Too tight, and the key gets stuck. Like Baby Bear's porridge they need to be 'just right'.
As I replaced each key mechanism I tested the clearance. Even though only a few jammed, nearly a third were a little too tight and dragged the key action. Four hours of testing, filing, testing and filing every single guide post saw the job finally done.
Once again the piano felt beautiful to play.
So why did the keys become sticky? The keys may have deformed over time, but I suspect the PVC guide posts are to blame. Over time they may have swelled as a reult of absorbing solvents from the grease.
This is exactly the same reason why we use silicon-based grease for our camera housings. Having re-greased the keys using silicon 'O'-Ring grease, our piano should feel great to play for many years to come.
Until the next post, take care out there and keep making beautiful music ( if that's what you do! ) ...Robert
 Update 2008-11-10 Response To a Received Email
I had no access to the service manual so simply undertook the task with screwdriver in hand and enthusiasm. I do remember that removing each and every key mechanism took a bit of knack and practice but I don't remember it being too difficult.
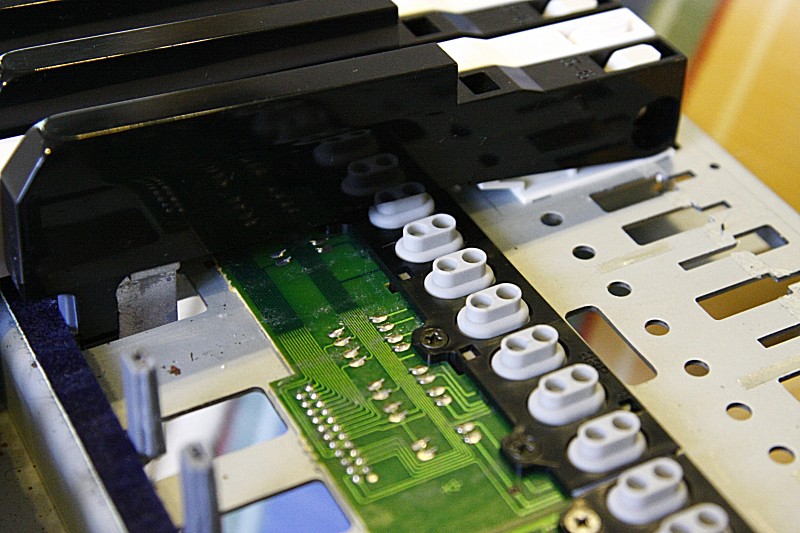
To clean the contacts (see photo ContactMech), I removed the rubber contact mechanism and cleaned both the carbon inserts and PCB contacts using methylated spirits and lint free optical tissues then reassembled.

The big job was the PVC guides (se photo PVC_Guides). This required very carefully sanding the outside edges of the guides with fine grade wet and dry emery paper then carefully cleaning with lint free tissues and then checking for fit. By making small changes and regular checking I effectively crept up on the correct fit. I set it to the barest perceptible drag with no slop.

Re-greasing (see a clear looking grease on the edges of the guides in the photo). Re-greasing required removal of all the old grease and the application of a small amount of silicon based grease. I used o-ring grease normally used to lubricate the silicon o-rings using in underwater camera housings. The key is the grease must not be petroleum based to avoid it being absorbed by the PVC and expanding.
... Robert
Update 2013-07-15 Response To a Received Email
I got another email asking about the 'trick; in getting the key mechanisms off the frame.
I actually can't remember now how I did it but looking at the photo of the back of the key where the white plastic base attaches to the pressed metal frame I can see that each key attaches into a round hole near the front and the double rectangular slotted cutout just behind it.
My guess is that I gently levered the front of the white plastic to clear the round pin from the round hole and then when lifted clear the rest of the white plastic base slid either forwards or backwards to be released.
Again, I am only guessing from what I can see in the photo.

 We recently acquired a pre-loved Roland HP1500 digital piano at a real bargain price.


