
Robert's Ramblings is my place to show my passion for this amazing world.
Images, words and insights are my way of sharing that passion.
Welcome to my blog.
Friday, January 12. 2024
Lough Leane Sentinel
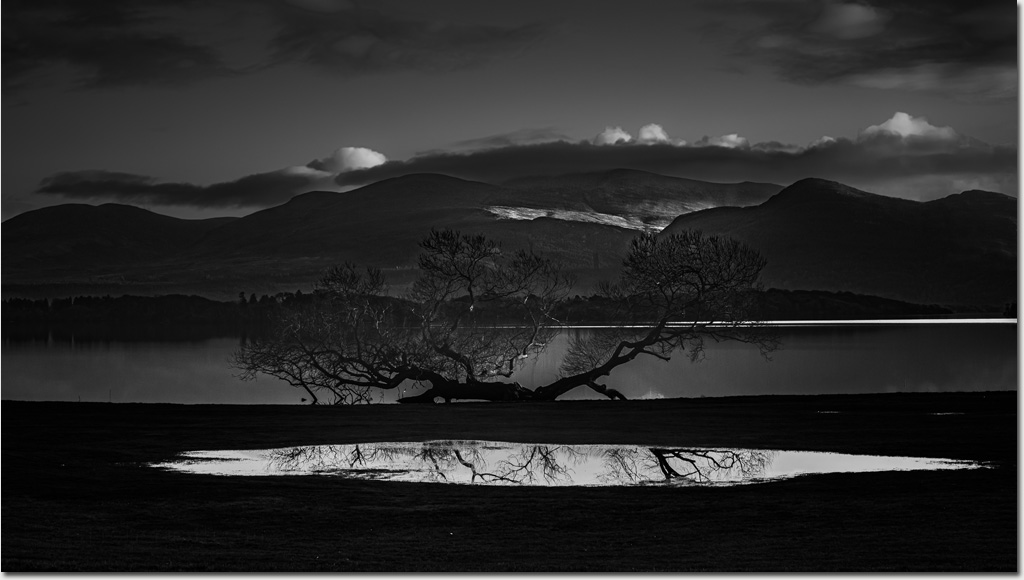
A winter bare tree looks out over Lough Leane.
A stray ray of sunlight hits the mountains of Killarney.
Pool sized puddles bear witness to bad weather.
I’m told January is the worst of it and the weather will only get better.
I’m really not sure what all the fuss is about.
#Ireland #killarney #loughleane #silhouette #blackandwhite #landscape #twilight
Thursday, January 11. 2024
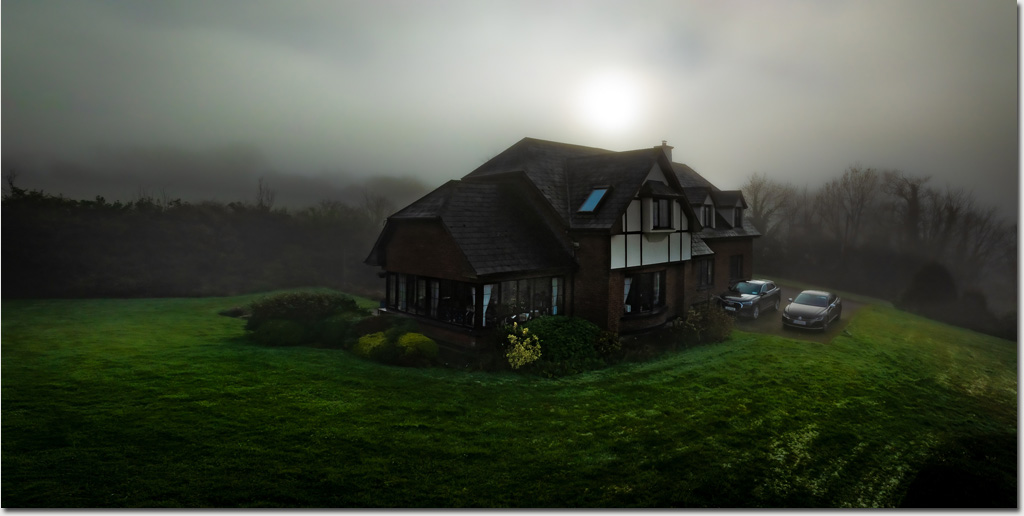
Peeping Out of the Mist
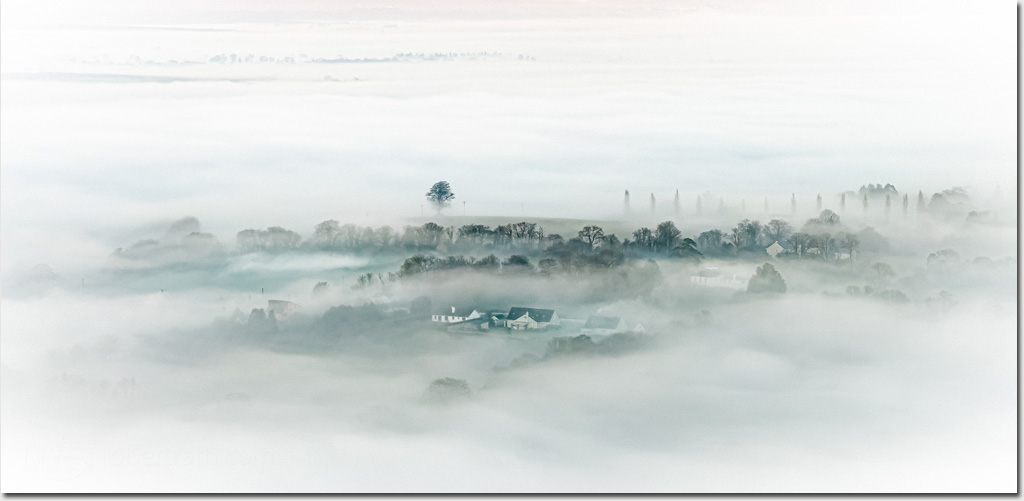
All day long the sun toiled hard to burn away the stubborn clouds. Hiding below, in the gloom, life continued in a manner familiar to anyone living through an Irish winter.
In the distance, defiant at last, a few lucky homes emerge from the mist to glimpse the setting sun.
#Ireland #clouds #village #mist #misty #landscape
Wednesday, January 10. 2024
A Not So Angry Bird
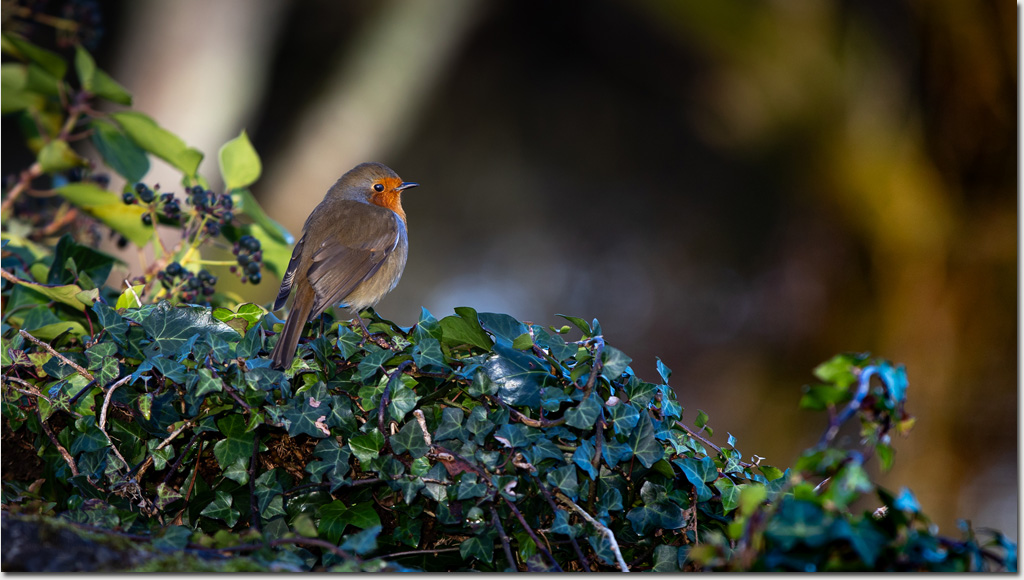
The more I learned about the European Robin the more I wondered where it came in the running relative to the movie character’s actual angry bird, the Northern Cardinal.
Apparently, the friendly and inquisitive robin red breast, one of Ireland’s favourite birds, can develop quite a temper when confronted with another red bearing antagonist.
Fortunately I was wearing green today.
#Ireland #europeanrobin #robin #redbreast #birds #kilarney
Tuesday, January 9. 2024
Land Above the Clouds
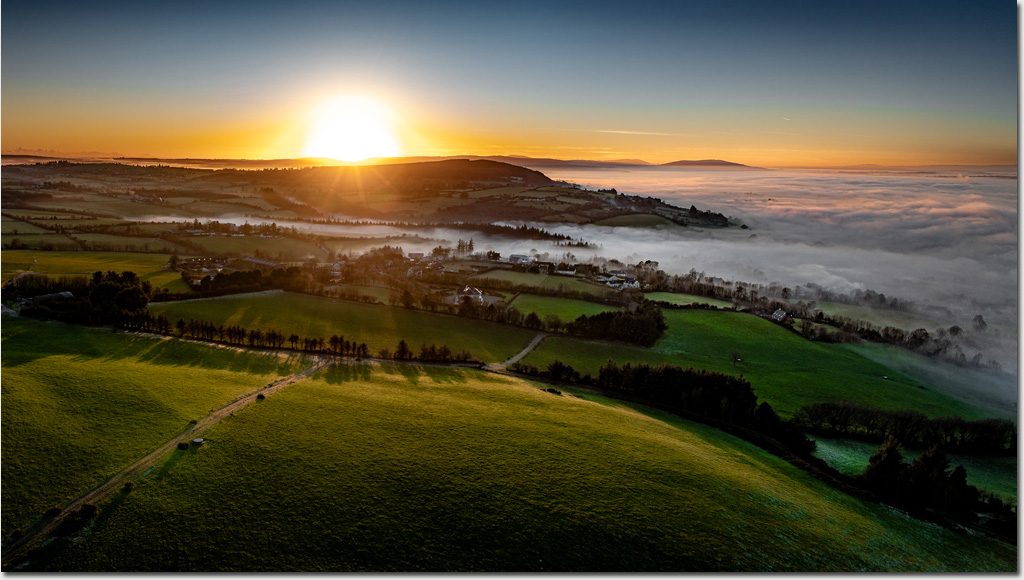
For most of the day we found ourselves shrouded in fog with a landscape of frosted green and white vanishing into the mist less than 50 meters away in all directions.
Where the sun should have been was a vast brightness while somewhere above a hint of blue suggested we had been under a receding ocean of white.
As evening approached, like a tide, the mist ebbed away leaving us in a land above the clouds.
#Ireland #cork #landscape #clouds #aerial #panorama
Monday, January 8. 2024
Cosy in the Irish Countryside
2023 is now part of history and was our last year in Australia before embarking on a new adventure.
I have been to Ireland many times before but coming here to live is completely different.
This is a move my wife and I have been planning for many years. For Jennifer it is a long awaited homecoming. For me it is fair trade between the comfort of living in Australia and the challenging but exciting opportunities of Irish landscape and underwater photography, of getting involved in traditional Irish music, and being close now to my family in continental Europe.
For now we are being looked after by Jennifer’s family in their cosy Irish countryside home. Tomorrow I start working again, and after than we’ll see how this adventure unfolds through 2024 and beyond.
#Ireland #countryside #rural #home #aerial
Saturday, December 9. 2023
Painted Man
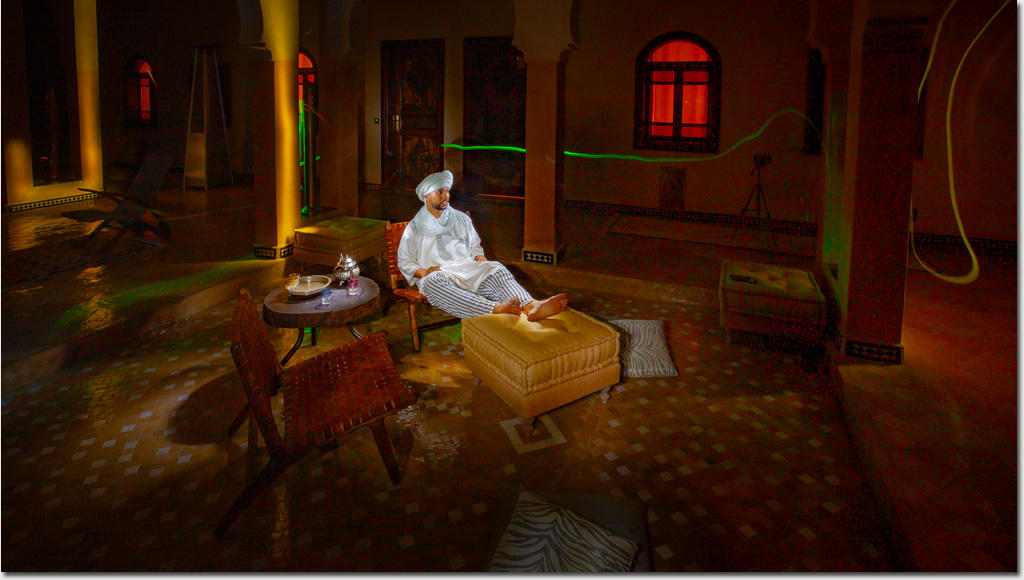
Adnane, sits perfectly still in the darkness for what must seem like some strange dream.
Meanwhile all around him there is a flurry of activity as artists with torches and wands of coloured light paint in the scene.
White light’s painted where the colours should be real, elsewhere we used colour to create the surreal. Once it took a darkroom to bring the painted man to light. Now we just preview and review and repeat ‘till it is right.
This was a fun night experimenting with long time exposures and light. Thank you Silvi for the experience and thank you to the models who stayed motionless all night.
#Morroco #lightpainting #art #experimental #travel #photography #light
Saturday, November 25. 2023
Castanets
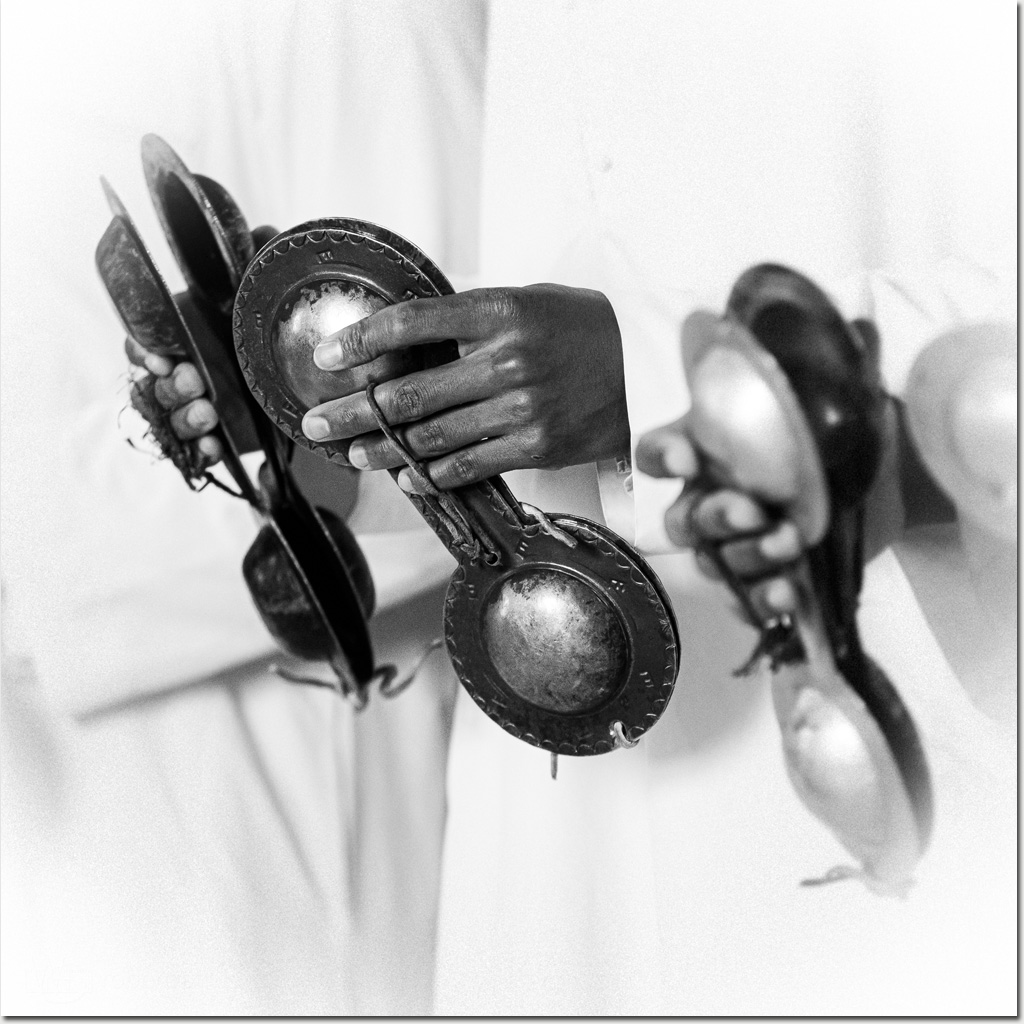
Castanets
In Marrakech I noticed castanets in many market stalls and alleyway shops. I even got the chance to see them being made in the local metalworking workshops.
It was not until well into central Morocco I finally got to hear them in traditional music.
I thought about bringing home a set to learn but decided on just memories instead.
#Morocco #music #musicians #castanets #traditionalmusic #instruments
Friday, November 24. 2023
It’s All in the Eyes Anyway
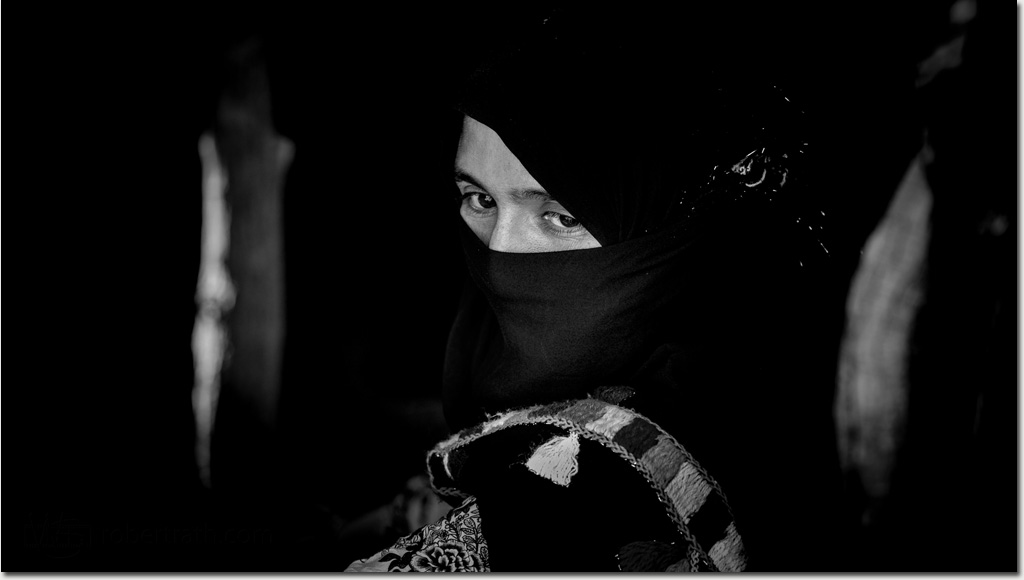
The hijab need not be be the symbol of modesty many people automatically think.
When the eyes are all there is to see there is so much more imagination, curiosity, mystery and of paying attention to that beautiful human behind those eyes.
#Morocco #travel #woman #hijab #mystery
Wednesday, November 22. 2023
High Five
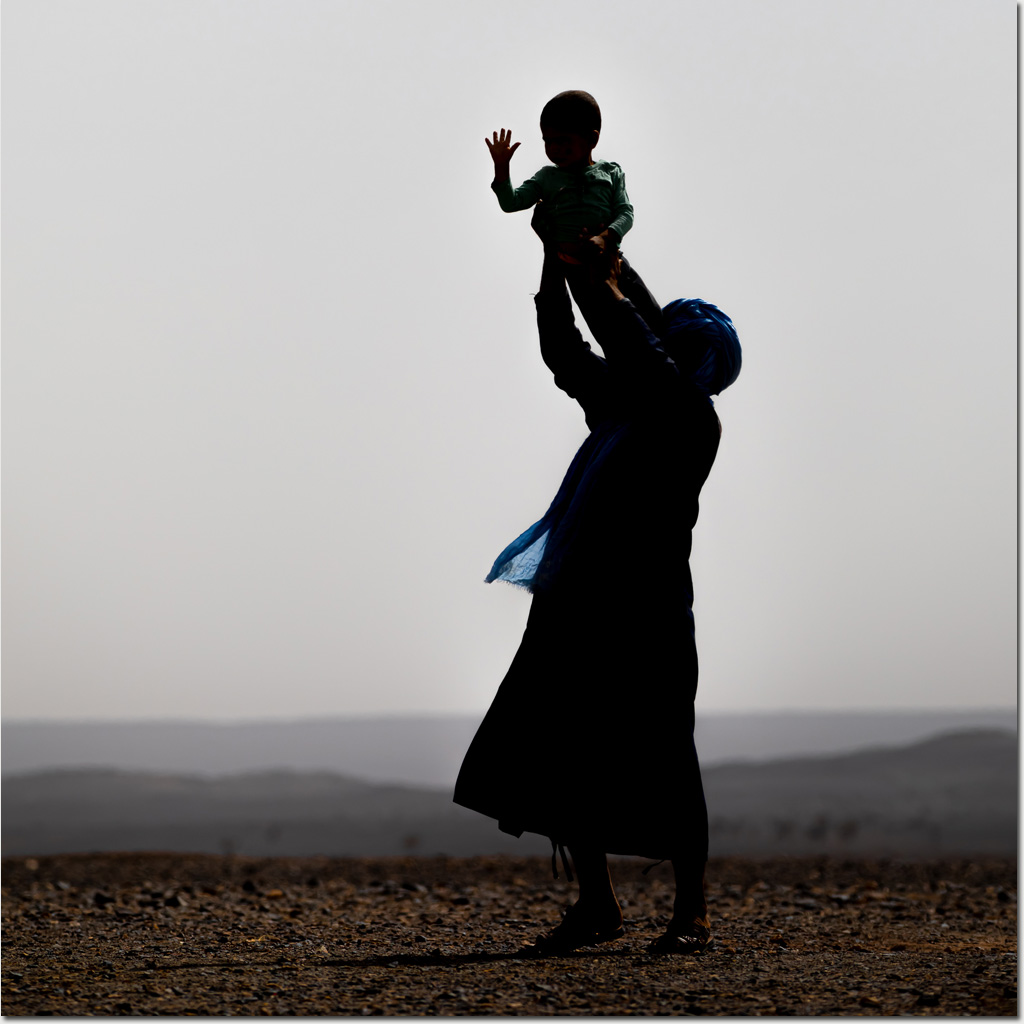
A nomad father lifts his son to high five visitors to his campsite.
Despite regular contact with travellers and their obvious wealth, the nomadic tradition is alive and well in central Morocco. Still, the telltales of change are obvious. Solar panels on the tent roofs, mobile phones and Chinese sneakers were signs of little cracks in tradition.
What the children will do is really the big question. Will they keep alive the nomadic ways of their forbears or will the lure of a bigger world out there be too much to resist.
Will there be any high fives here a hundred years from now? Time will tell.
#Morocco #travel #ergchebbi #nomads #travel #family #silhouette
Monday, November 20. 2023
Desert Teatime
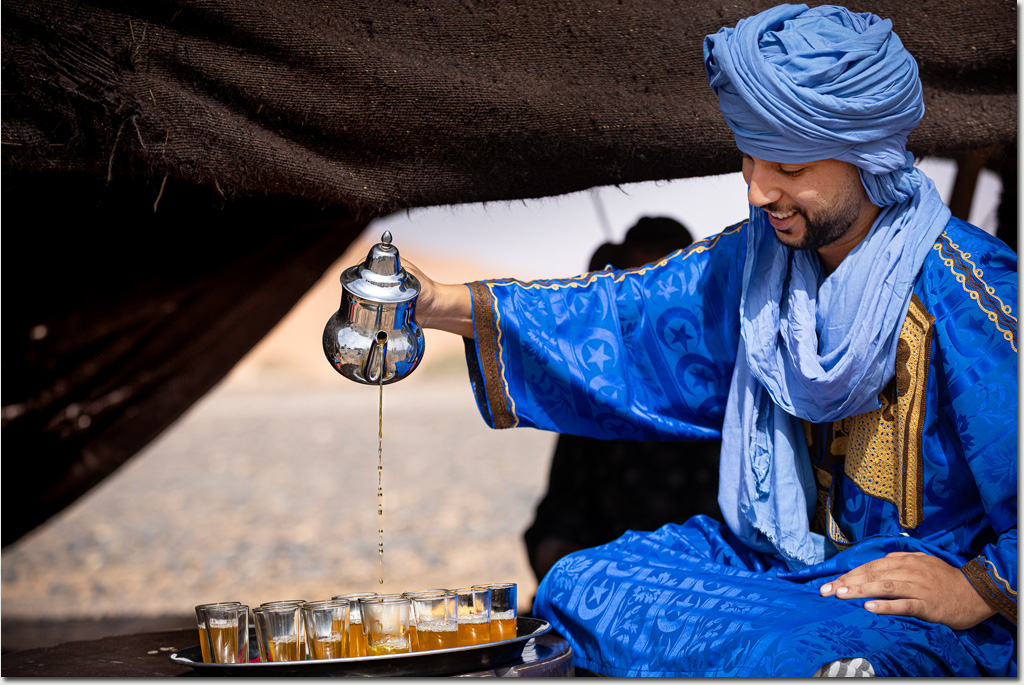
The riads of Marrakech, the mountain guest houses and the nomadic desert camps all shared the same Moroccan tradition, they greeted us with a tea ceremony on our arrival.
Sugar sweetened mint tea is most common but during our stay in Morocco we were offered brews of green and black blends, mint leaf tea blends and various combinations with and without sugar.
It’s quite special watching the tea being poured into tiny cups from a half meter above without a drop being spilled.
Here Adnane deftly demonstrates his skill dealing with a heavy teapot, sloping ground and a fresh crosswind, all while maintaining his boyish smile. A most hospitable teatime welcome in the desert.
#Morocco #travel #mint #tea #tradition #desert #nomad #ceremony
Saturday, November 18. 2023
Friends on the Road
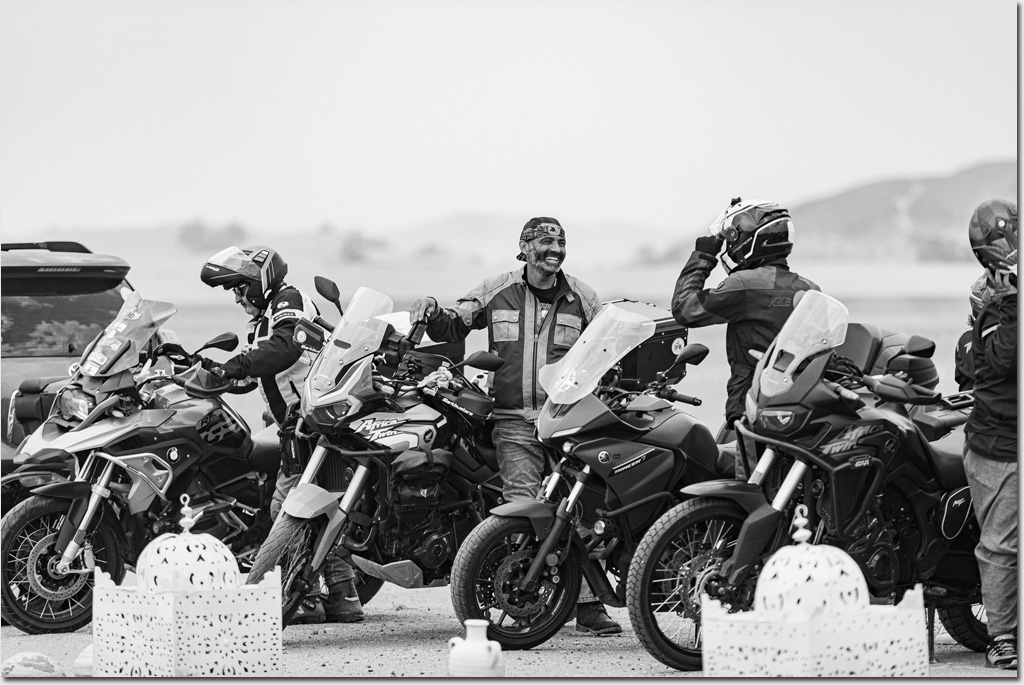
Somewhere in the heart of Morocco we watched a band of bikers emerge from the distance, turn into the place where we were and pull up as a group. Should we be concerned?
The moment helmets came off and they shared their beaming faces with each other I felt the same joy and elation of travelling with friends, exploring far away places and sharing extraordinary experiences.
Perhaps they started their travel as strangers and became friends on the road, perhaps they were life long friends. What matters, like us, they were sharing the time of their lives.
#Morocco #travel #bikers #motobikes #comrades #mates #friends #blackandwhite
Thursday, November 16. 2023
Shifting Sands
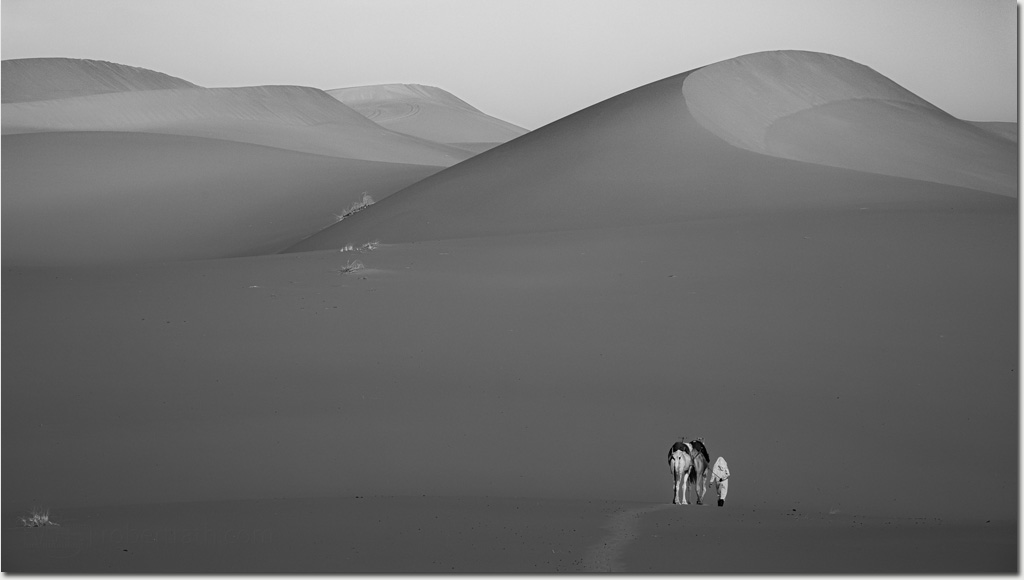
In this quiet moment I watch a camel handler appear from the dunes to the east, make their way unhurriedly past me, and finally disappear among the dunes to my west. This scene could be from a month or a year ago. It could be one hundred years old, even one thousand.
But the form of these dunes is not the same as the dunes of a thousand years ago. These are not the dunes of one hundred years ago, or even a year. This landscape is ever changing, always reshaping itself.
#Morocco #travel #sand #dunes #camels #desert #landscape #nomads
Sunday, November 12. 2023
Life in The Ksar

Moving through the dark and sunlit alleys of El Khorbat, both eyes and cameras struggled to adjust to the dramatic changes in light.
This image of young boys hanging out would have turned out very different if my camera was on fully automatic. Instead, this chance shot captures laughter, movement and fun in away I could never have planned.
#Morocco #elkhorbat #desert #travel #ksar #people #alleyways #motion #blur #desertlife #boys
Saturday, November 11. 2023
Secret Places in El Khorbat

El Khorbat was one of the most amazing places I experienced in Morocco. It is a 150 year old fortified village, otherwise known as a ksar, built entirely of rammed earth. A fortress in the desert.
Its internal grid of alleys and side alleys, mostly hidden within the greater ksar structure, creates an undercover labyrinth providing protection from the wind and the desert heat outside.
As we moved through the village we caught glimpses of people far off down side alleys going about their business under shafts of sunlight piercing the darkness.
#Morocco #elkhorbat #desert #travel #ksar #structure #people #alleyways #labyrinth
Sunday, November 5. 2023
The Site Seers

Wild places, and especially desolate ones, stir things deep and unspoken within us. They bring us thoughts and feelings and ideas that delight, enthral, confuse and sometime even scare.
I wonder how many lives have changed in profound ways simply from the experience of some wild and desolate place giving them some new vision.
I wonder if these people will ever be the same again.
#Morocco #ergchebbi #sand #dunes #blackandwhite #travel #sahara #desert #moody #silhouette
Saturday, November 4. 2023
Danny and Silvi
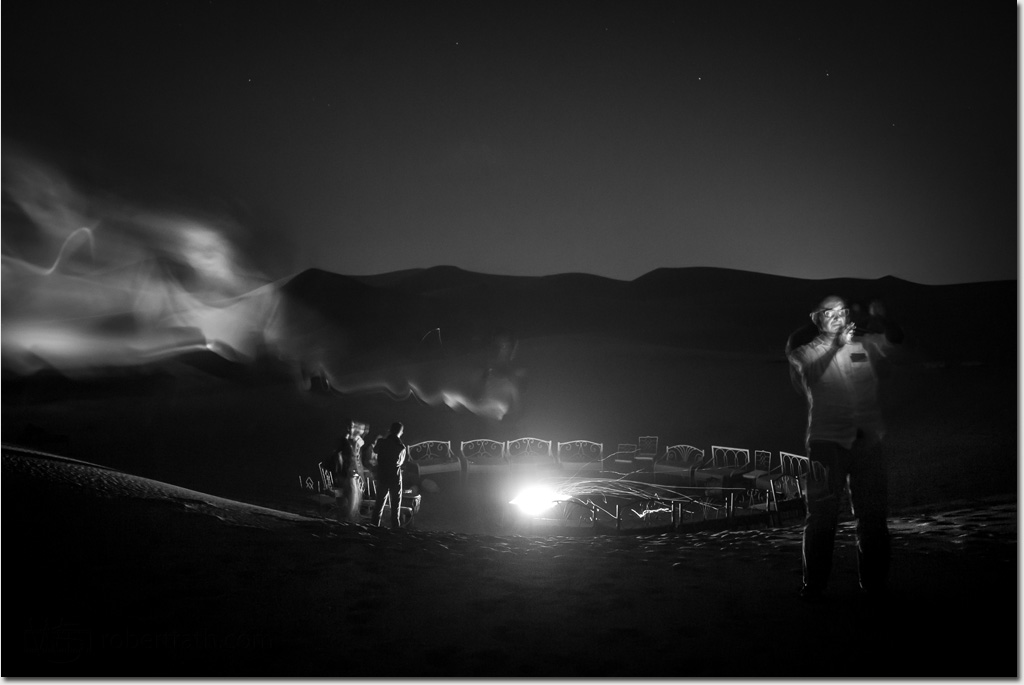
This unlikely juxtaposition of Saharan desert, campfire and ghostly lithium-driven illumination tells much about modern travel and exotic remote places.
Wherever we go we almost expect the ether will be filled with those precious radio waves that bring an intrusive internet into places where perhaps it should not be.
Danny and Silvi, lit by their devices, exemplify being present and being elsewhere in the same moment.
#Morocco #ergchebbi #travel #sahara #desert #dunes #night #blackandwhite #moody
Wednesday, November 1. 2023
Desert Jammin’
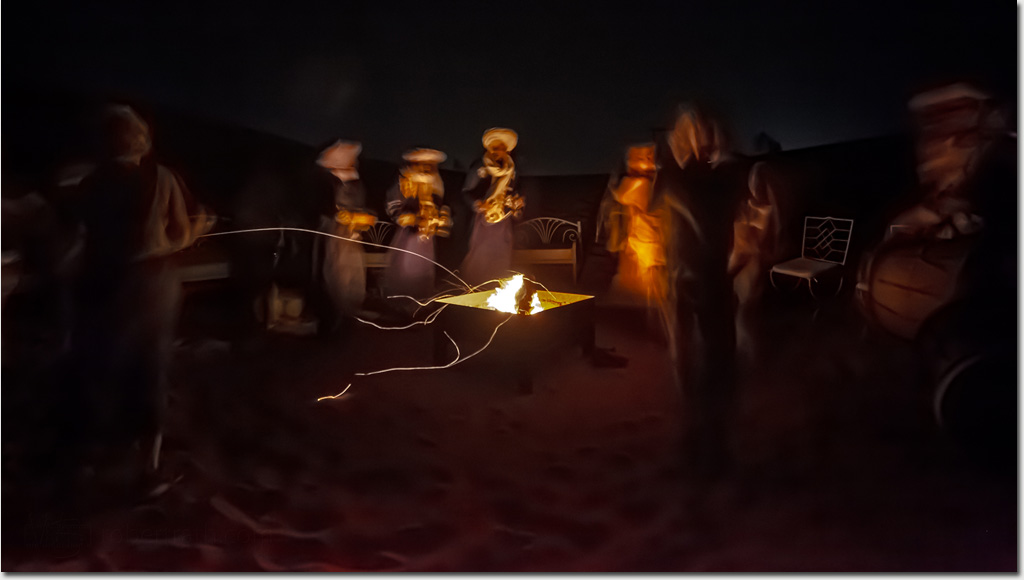
The wind dropped, the whipping sand abated, and the chance for a firelight session presented itself.
As the fire banished desert darkness, haunting African voices, Moroccan djembe double drums and rattly castanets filled the empty soundscape with synesthetic colour.
We listened, we sang along, we celebrated the ineffable experience of a Saharan desert night hundreds of thousands miles from home.
#Morocco #sahara #desert #travel #sanddunes #sand #dunes #night #music #ergchebbie #jamming
Sunday, October 29. 2023
Desert Dreaming
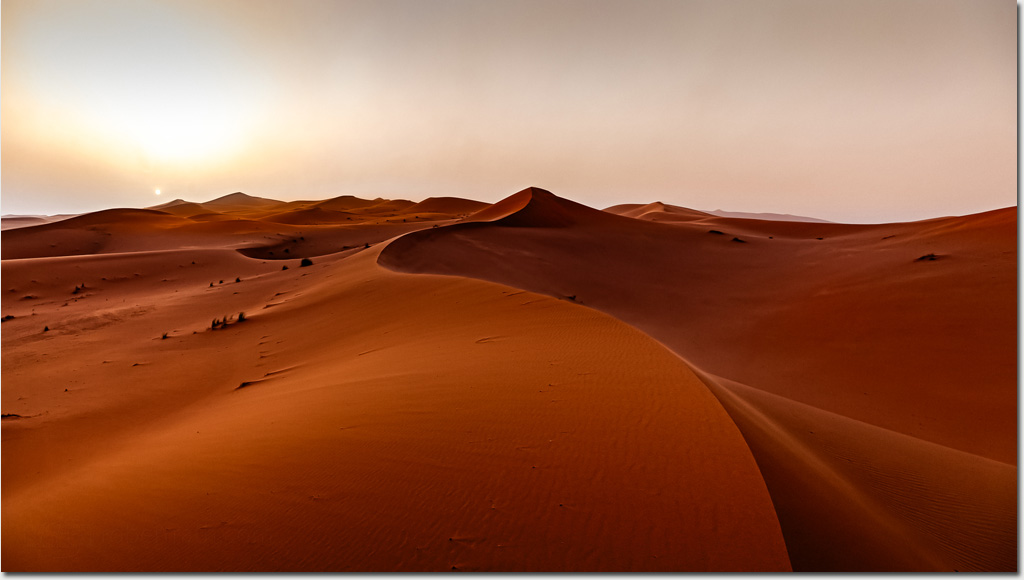
I’ve been privileged to experience some extraordinary places, however the Moroccan Sahara on the Algerian border not only took my breath away with its stunning sandscapes but also left me in awe and wonder at the people who live here in such an inhospitable yet beautiful place.
We arrived here to Erg Chebbi and into a mild sandstorm just before sunset which created an otherworldly feel to this already extraordinary place. At least one camera did not survive the sunset with windblown sand doing its worst.
As the evening progressed the wind dropped and the desert became dreamy and almost welcoming.
#Morocco #sahara #desert #travel #sanddunes #sand #dunes #sunset #sandstorm #landscape #sandscape #ergchebbie
Friday, October 20. 2023
Ships of the Desert
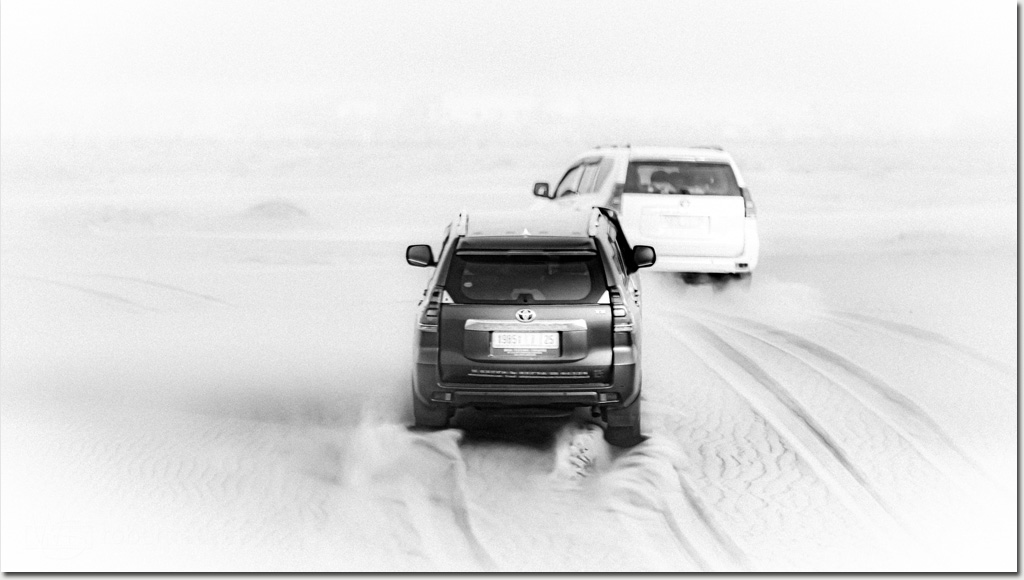
Camels, ships of the desert, were once the only way to traverse the vast desert regions south of the Altas mountains. They were built robust, reliable and dependable with enormous range and great fuel economy. They were also smelly and bad tempered but that was a small price to pay for their great value.
There are camels still used in the old traditions however the real ship of the desert now is the Toyota LandCruiser. They too are built robust, reliable and dependable with enormous range. Fuel economy is poor and their impact on the environment not good but that’s a small price to pay for dust free comfort, great suspension, air-conditioning and streaming Spotify.
#Morocco #sahara #desert #merzouga #4wd #sand #dunes #toyota #landcrusier
Tuesday, October 17. 2023
Eat Your Greens
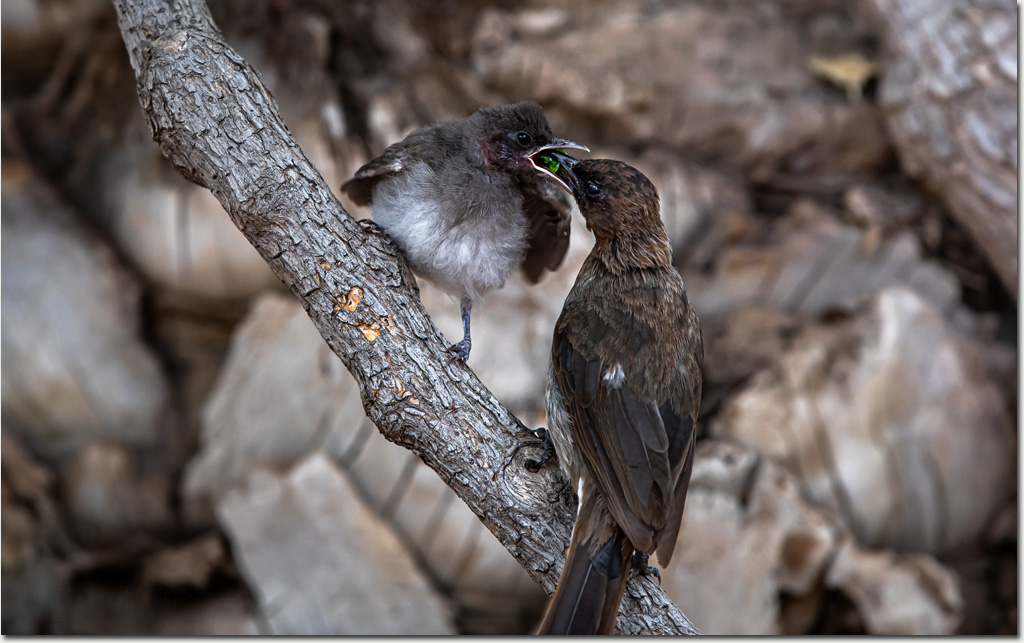
Almost every parent has mastered the art of flying spoon food delivery into a reluctant infant’s mouth. I’m almost certain that that flying spoon never contained leafy greens or blanched vegetables! As for raw, well, you’d have worn it for sure!
This little chick was totally happy to eat tiny pieces of a succulent plant that mum was collecting nearby. I am sure she was getting a little meat on the side but as for eating her greens, she was the perfect role model.
#ornithology #feeding #birds #morocco #travel #nurture #nature
Monday, October 16. 2023
Amazigh Life
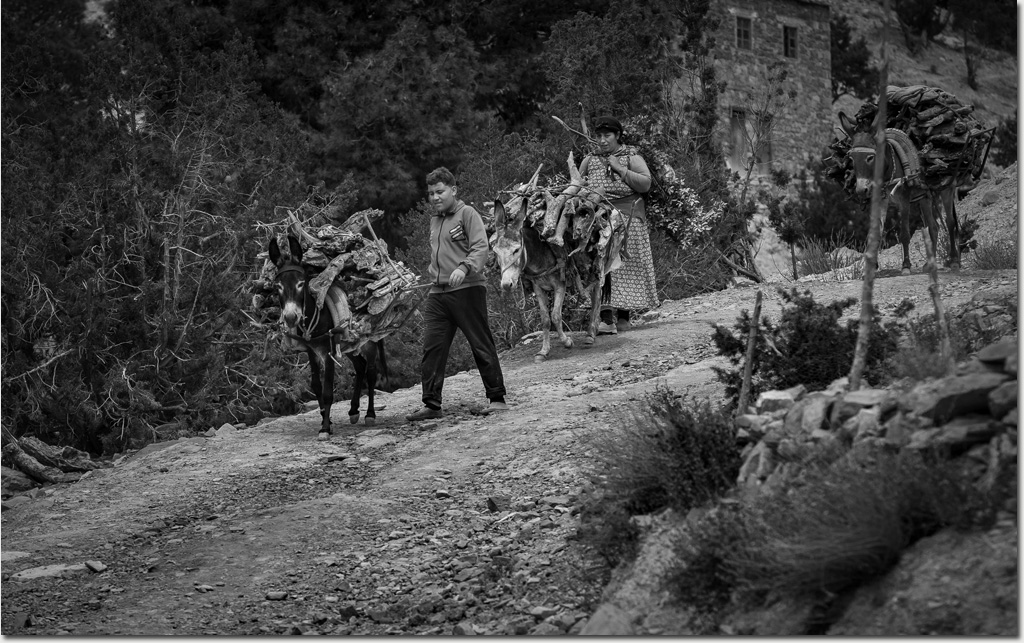
It was both lovely and humbling spending time amid the Amazigh people of Zaouiat Ahansa. This is a place where motorised vehicles were absent, where people commuted by foot and donkeys carried goods, firewood and people. A rare extravagance might even be a rider on horseback.
When I say, “amid the Amazigh”, I do not mean in any interactive way. They were both polite and shy and seemed to flow around us going about their business as if we were not even there while the High Atlas mountain grades did not seem to bother man nor beast.
Alas we had to move on but the idea of lingering here for weeks or even months had a delightful, almost whimsical charm I will miss.
#morocco #ZaouiatAhansa #highatlas #mountains #donkeys #amazigh #rural #village #blackandwhite
Sunday, October 15. 2023
How to Build a House
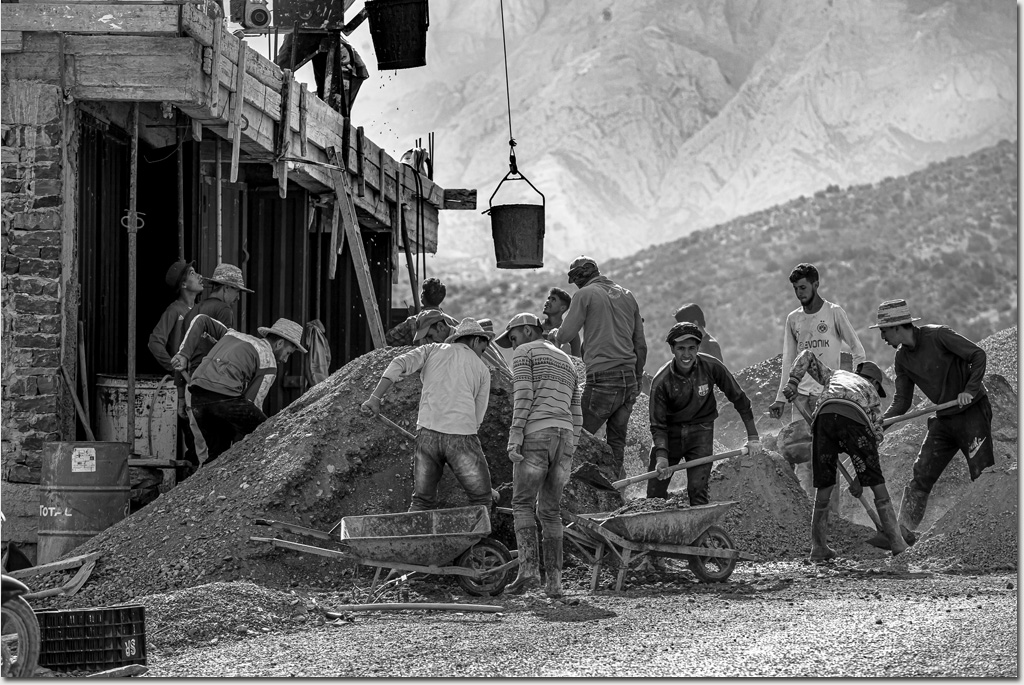
We spent a couple of days exploring Zaouiat Ahansa and witnessed some of the most beautiful expressions of people and place.
Early one morning out walking I noticed small groups of boys and men wielding shovels, carrying buckets or pushing wheelbarrows all heading in the same direction. I thought it a little unusual but did not think I’d discover any reason why.
Later in the morning I walked back in the same direction and came across a frenzy of boys and men and shovels and buckets and concrete all working in close quarters on this house together. Somehow in this chaos, a house was being built, everyone seemed happy in their work and no one was getting hurt doing it.
The scene was so unexpected and so surprising and so delightful. Yet another reason why I love Morocco.
#Morocco #ZaouiatAhansa #highatlas #mountains #construction #teams #manpower #manuallabor #building #blackandwhite
Saturday, October 14. 2023
Robert Rath
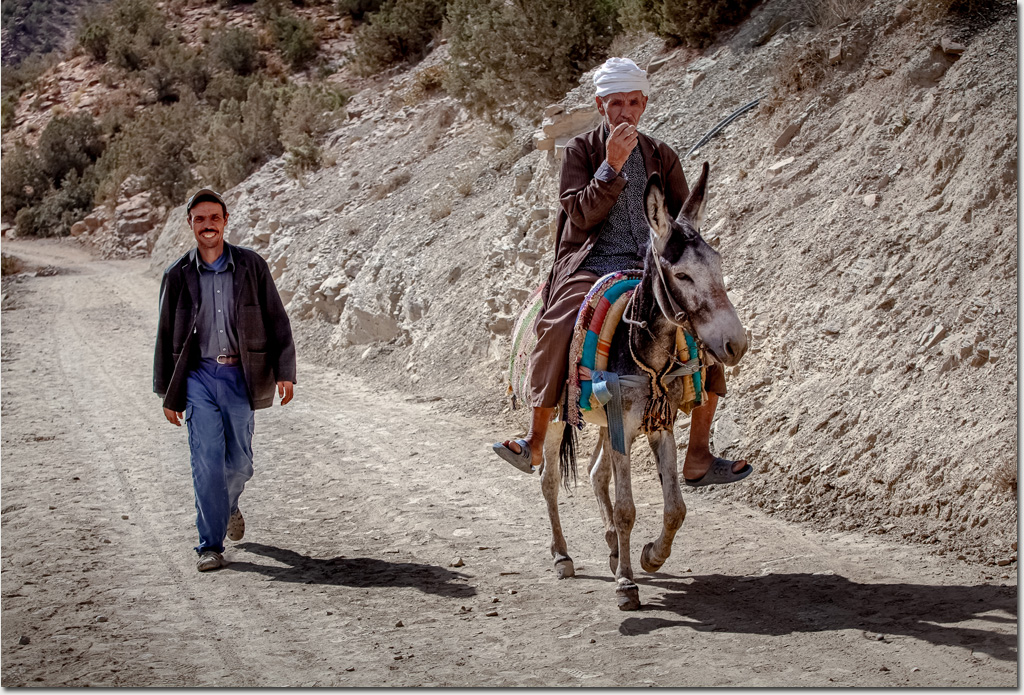
Sunshine, Shadows and Shirts
Here in the High Atlas mountain village of Zaouiat Ahansal we explored the deep valley and gazed in awe upon the high desert peaks.
There were no tourists here and we felt like strangers in a strange land. Children scrabbled for attention, young men smiled and old men kept poker faces. The women kept to themselves. Regardless I felt welcome provided I showed deference and respect.
I so wanted to ask this old man about his amazing shirt while the young fella just laughed.
That’s why I love Morocco.
#Morocco #highatlas #mountains #zaouiat #travel #colour #donkey
Monday, October 9. 2023
Bathing Under the Ouzoud Falls
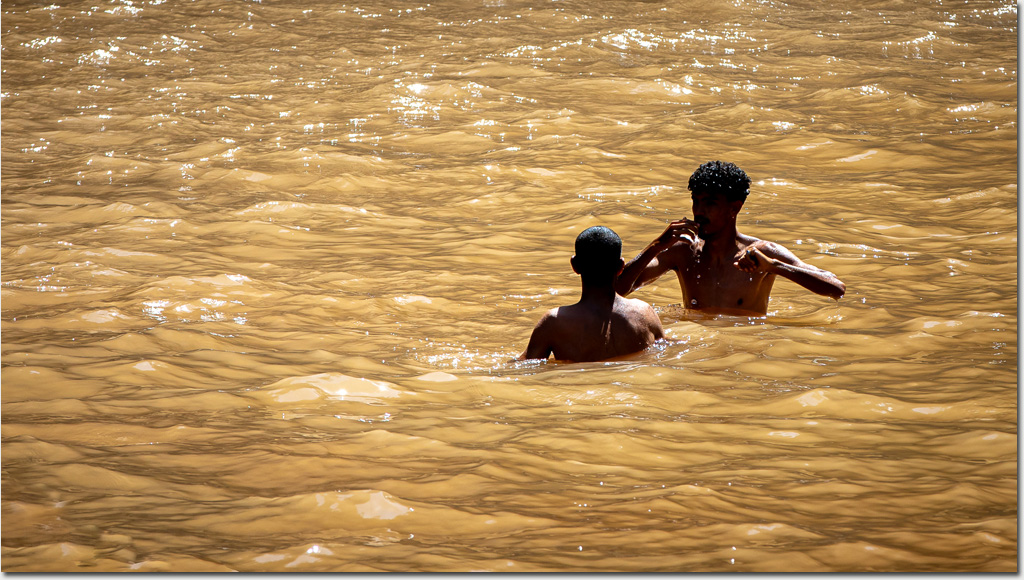
Bathing Under the Ouzoud Falls
Despite the steep and hot walk down to the base of Ouzoud Falls, the colour of the water did not seem that inviting, still I would have been in there in a shot if we more time here.
I watched these two you men enjoy the sunshine, and the water and the constant mist spray of the falls and wished I was in there with them.
#morocco #travel #highatlas #mountains #swimming #water #waterfalls #ouzoudfalls
Sunday, October 8. 2023
The High Atlas

Escaping the craziness of Marrakech the High Atlas mountains were like travelling to another planet. At first they reminded me of the Norther Flinders Ranges in South Australia but the more I noticed, the uniqueness of these mountains became more and more obvious.
The High Atlas mountains contain Northern Africa’s highest peak, Toubkal, at 4167m and our highest mountain pass was 2260m, about 32m higher that Australia’s tallest peak of Mount Kosciuszko. It is hard to capture the vastness of these desert mountains. You really have to see them for yourself to feel their immensity.
#blackandwhite #morocco #travel #highatlas #mountains #monochrome
Saturday, October 7. 2023
Street Jewels
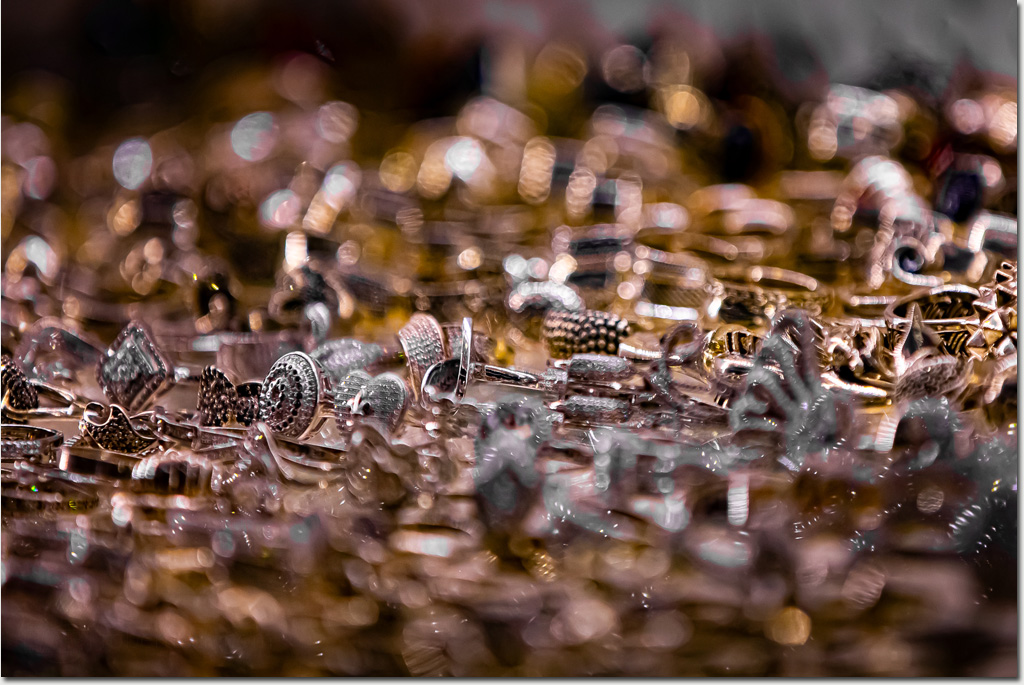
Gold and silver and jewels and more silver and more jewels. The markets in the old Medina cater for every taste and every whim.
After a while a stroll becomes monotonous. The same pots, the same rugs, the same shoes, the same trinkets. There is something comforting in sameness, in monotony. Perhaps abundance or lack of scarcity creates a comfort even if it’s an illusion.
Still it’s nice to re-frame, and look again through the eye of a wide open lens.
#colour #morocco #marrakech #travel #jewellery #bokeh #abstract
Friday, October 6. 2023
Pussycat Alley

Cats, cats everywhere. There were blacks ones and white ones and ones with a little yellow on them and they all looked like they owned the place and they all seemed just the same.
None seemed to be owned by anyone yet they all appeared to be looked after by the locals. During my exploration of the old Medina I found little bowls of food and water in tucked away nooks.
One thing I did note however is that none of these stray cats had morphed into the oversize wildlife killers we see in Australian strays. I guess there’s not much wildlife in Marrakesh if you don’t include the tourists.
I did find it a little strange to find cats here and not dogs but I guess it makes sense. Cats are both bold and polite and integrate seamlessly in the bustle of Marrakech life.
#colour #morocco #marrakech #travel #cats #animals #street
Thursday, October 5. 2023
Universal Art Of Cities
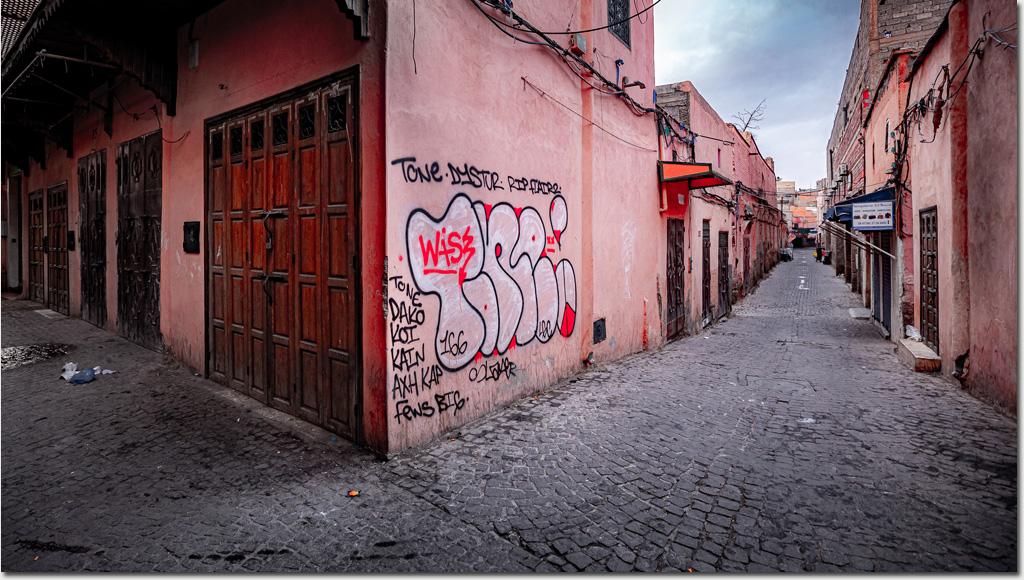
An early morning walk through the Medina revealed a very different but strangely familiar city.
The hawkers had not yet opened their doors or arrived to set up for the day. Some litter lay around but surprisingly little. What I did not expect was that familiar sight of graffiti on walls.
I wonder if I might find graffiti in every city of the world and from now on will go looking for it in places I would never have thought.
Perhaps graffiti is the universal art of cities. Time and travel will tell.
#colour #morocco #marrakech #travel #graffiti #art #streetart
Wednesday, October 4. 2023
Communal Oven
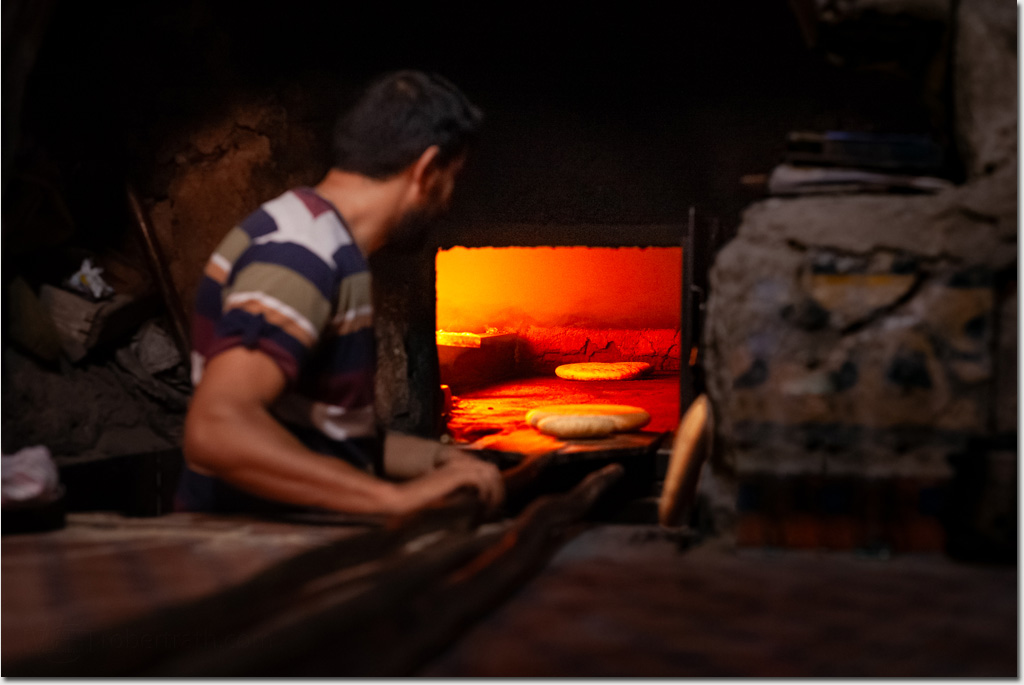
In Marrakech a community baker is at work. Here local families bring their freshly leavened loaves to be baked. One man is responsible for the entire day’s baking and he has to get every one of those loaves perfect.
To say more about this Moroccan tradition I would only be paraphrasing so here is a link that has more about this wonderful community aspect of Moroccan traditional life.
https://www.citynibbler.com/home/2019/2/20/communal-ovens-morocco
#colour #morocco #marrakech #travel #bread #baking #community #culture
Tuesday, October 3. 2023
Trinket Treasure
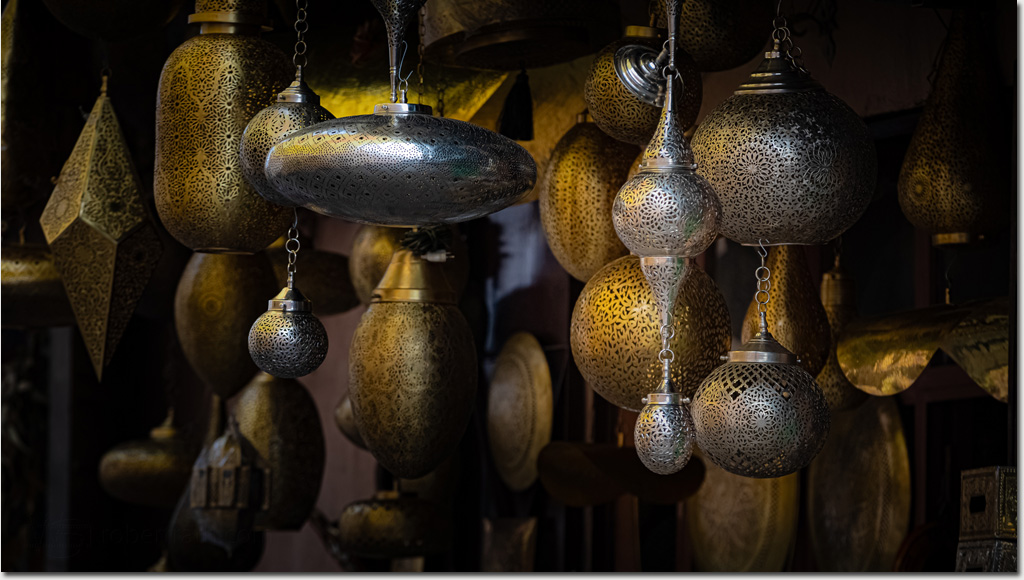
In the alleyways of the medina can be found any number of souvenir trinket shops to lure the visitor into parting with their tourist dollar for some Moroccan treasure. Unfortunately the goods that might actually be useful tend to be too hard to pack or made from materials that Australian customs would frown upon.
These beautiful incense burners might have just made the grade and presented such a stunning visual display that I decided to bring them all home with me … in my camera.
#colour #morocco #marrakech #travel #trinkets #incenseburners
Subscribe To My Posts
My Networking Sites
Twitter Updates
Calendar
Quicksearch
Archives
Categories
Syndicate This Blog

Blog Administration
random pics
